
Christmas Tree Rice Krispie Treats
Introduction
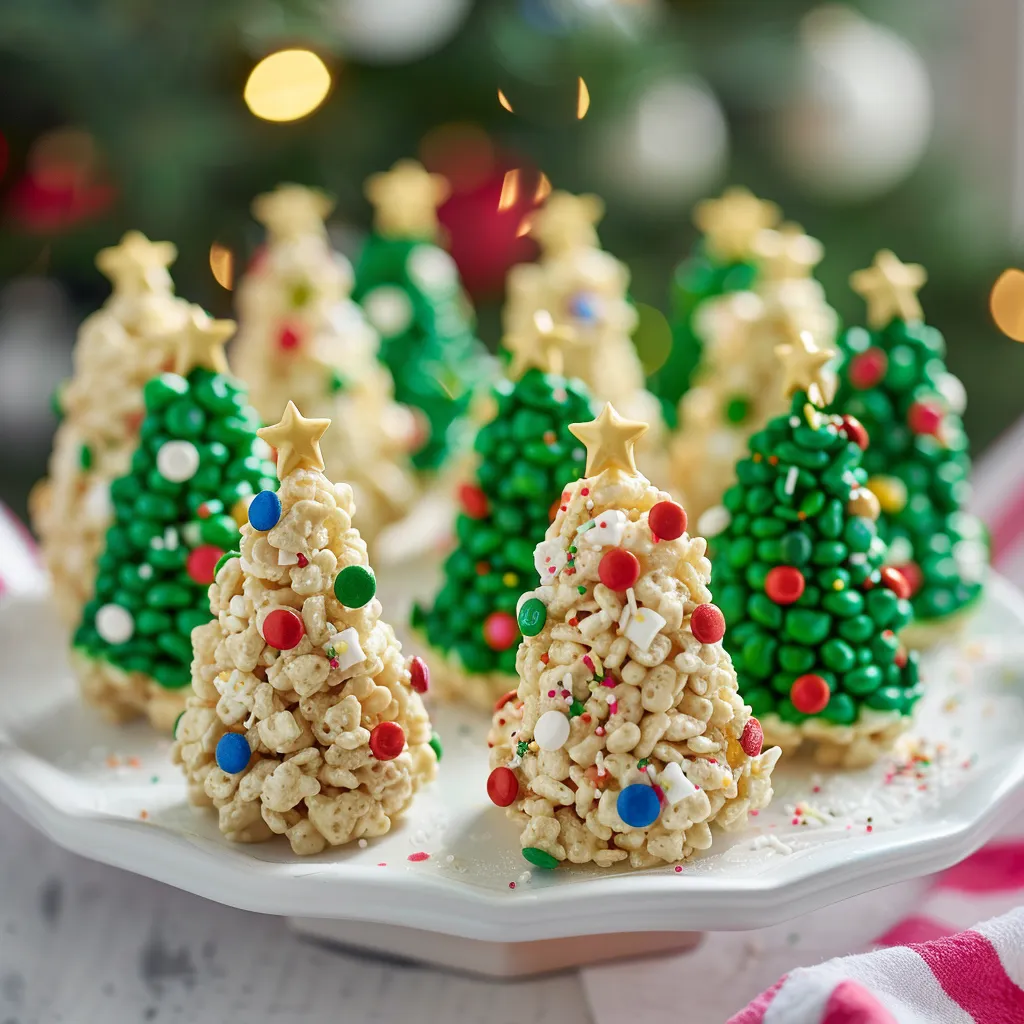
Have you ever wondered how a simple childhood treat can be transformed into a festive masterpiece? Rice Krispie treats are a nostalgic favorite, but with a little creativity, they can become the centerpiece of your holiday celebrations. This Christmas, why not impress your family and friends with Christmas Tree Rice Krispie Treats? These delightful, tree-shaped treats are not only fun to make but also visually stunning, making them perfect for festive gatherings. In this post, we will explore everything you need to know to create these delicious treats, from ingredients to serving suggestions.
Ingredients List
To make your Christmas Tree Rice Krispie Treats, you’ll need the following ingredients:
- 6 cups Rice Krispies cereal: The classic base for your treats.
- 4 tablespoons unsalted butter: For richness and flavor.
- 1 package (10 oz) mini marshmallows: The sticky goodness that holds everything together.
- 1 teaspoon vanilla extract: A hint of flavor that enhances the sweetness.
- Green food coloring: To give your trees that festive color.
- Decorations: Use sprinkles, edible glitter, or small candies (like M&M’s or chocolate chips) for ornaments.
Substitutions
- Butter: You can use coconut oil or margarine for a dairy-free option.
- Mini Marshmallows: If you can’t find mini marshmallows, regular ones work just fine; just chop them into smaller pieces.
- Cereal: Substitute with any puffed rice or even gluten-free cereal for a different texture.
Timing
Creating these Christmas Tree Rice Krispie Treats is quick and easy! Here’s a breakdown of the timing:
- Preparation Time: 15 minutes
- Cooking Time: 10 minutes
- Total Time: 25 minutes
This is significantly faster than many traditional holiday desserts, which can take hours to prepare!
Step-by-Step Instructions
Step 1: Melt the Butter and Marshmallows
In a large saucepan, melt the butter over low heat. Once melted, add the mini marshmallows and stir continuously until they are completely melted and smooth. This should take about 5 minutes.
Tip: Keep the heat low to prevent burning the marshmallows.
Step 2: Add Vanilla and Food Coloring
Remove the saucepan from heat. Stir in the vanilla extract and a few drops of green food coloring until you achieve your desired shade of green.
Tip: Start with a small amount of food coloring; you can always add more!
Step 3: Mix in the Rice Krispies
Gradually add the Rice Krispies cereal to the marshmallow mixture, stirring until all the cereal is evenly coated.
Tip: Use a spatula or a wooden spoon for easier mixing.
Step 4: Shape the Trees
Transfer the mixture to a greased baking sheet or a large piece of parchment paper. Allow it to cool slightly, then use your hands (greased with butter) to shape the mixture into triangular tree shapes.
Tip: Wet your hands slightly to prevent sticking.
Step 5: Decorate Your Trees
Once shaped, let the treats cool completely. After they have set, use frosting or melted chocolate to attach your decorations like sprinkles or candies.
Tip: Get creative! Use different colors and types of decorations to make your trees unique.

Nutritional Information
Here’s a quick overview of the nutritional information for a single serving (1 tree):
- Calories: 150
- Total Fat: 6g
- Saturated Fat: 4g
- Cholesterol: 15mg
- Sodium: 50mg
- Total Carbohydrates: 23g
- Dietary Fiber: 0g
- Sugars: 10g
- Protein: 1g
Nutritional Insights
These treats are a fun addition to your holiday spread, but moderation is key! Consider pairing them with healthier snacks to balance out the sweetness.
Healthier Alternatives for the Recipe
If you’re looking to make your Christmas Tree Rice Krispie Treats a bit healthier, consider the following alternatives:
- Use brown rice syrup instead of marshmallows for a more natural sweetener.
- Add protein by mixing in some protein powder or using a high-protein cereal.
- Incorporate nuts or seeds for added nutrition and crunch.
Dietary Adaptations
- Vegan: Use vegan butter and a plant-based marshmallow alternative.
- Gluten-Free: Ensure your Rice Krispies are certified gluten-free.
Serving Suggestions
These Christmas Tree Rice Krispie Treats can be served in various creative ways:
- On a festive platter: Arrange them on a decorative plate or cake stand for a beautiful presentation.
- As party favors: Wrap individual treats in cellophane and tie with a ribbon for a delightful gift.
- In a dessert buffet: Include them alongside other holiday treats for a colorful spread.
Personal Touch
Consider adding a small tag with the recipe name or a sweet holiday message for an extra special touch.
Common Mistakes to Avoid
Creating the perfect Christmas Tree Rice Krispie Treats is easy, but here are some common pitfalls to avoid:
- Not greasing your hands: This will lead to sticky fingers and frustration when shaping the trees.
- Overheating the marshmallows: This can cause them to become hard and chewy instead of soft and gooey.
- Skipping the cooling time: Allowing the treats to cool properly ensures they hold their shape.
Storing Tips for the Recipe
To keep your Christmas Tree Rice Krispie Treats fresh:
- Store in an airtight container at room temperature for up to 3 days.
- Refrigeration can make them hard; if you must refrigerate, allow them to come to room temperature before serving.
- Freeze for longer storage: Wrap each treat in plastic wrap and place them in a freezer bag for up to 2 months. Thaw at room temperature before serving.
Conclusion
In just a few simple steps, you can create delightful Christmas Tree Rice Krispie Treats that will bring joy to your holiday celebrations. With a bit of creativity and personalization, these treats are sure to be a hit. We invite you to try this recipe and share your feedback in the comments below. Don’t forget to subscribe for more delicious holiday recipes!
FAQs
1. Can I make these treats ahead of time?
Yes! You can prepare them a day or two in advance. Just store them in an airtight container to keep them fresh.
2. What if I don’t have green food coloring?
You can use other colors to create different holiday themes, or simply leave them white and decorate with colorful sprinkles.
3. How do I prevent the treats from being too hard?
Make sure to melt the marshmallows over low heat and avoid overcooking them. Proper cooling time is also essential.
4. Can I use different types of cereal?
Absolutely! Feel free to experiment with other cereals, but keep in mind that the texture and flavor may change slightly.
5. Are there any nut-free options?
Yes! Simply omit any nuts or seeds from the recipe and ensure that all ingredients are nut-free.

Christmas Tree Rice Krispie Treats
Ingredients
- 6 cups Rice Krispies cereal: The classic base for your treats.
- 4 tablespoons unsalted butter: For richness and flavor.
- 1 package (10 oz) mini marshmallows: The sticky goodness that holds everything together.
- 1 teaspoon vanilla extract: A hint of flavor that enhances the sweetness.
- Green food coloring: To give your trees that festive color.
- Decorations: Use sprinkles, edible glitter, or small candies (like M&M's or chocolate chips) for ornaments.
Instructions
Step 1: Melt the Butter and Marshmallows
In a large saucepan, melt the butter over low heat. Once melted, add the mini marshmallows and stir continuously until they are completely melted and smooth. This should take about 5 minutes.
Tip: Keep the heat low to prevent burning the marshmallows.
Step 2: Add Vanilla and Food Coloring
Remove the saucepan from heat. Stir in the vanilla extract and a few drops of green food coloring until you achieve your desired shade of green.
Tip: Start with a small amount of food coloring; you can always add more!
Step 3: Mix in the Rice Krispies
Gradually add the Rice Krispies cereal to the marshmallow mixture, stirring until all the cereal is evenly coated.
Tip: Use a spatula or a wooden spoon for easier mixing.
Step 4: Shape the Trees
Transfer the mixture to a greased baking sheet or a large piece of parchment paper. Allow it to cool slightly, then use your hands (greased with butter) to shape the mixture into triangular tree shapes.
Tip: Wet your hands slightly to prevent sticking.
Step 5: Decorate Your Trees
Once shaped, let the treats cool completely. After they have set, use frosting or melted chocolate to attach your decorations like sprinkles or candies.