
Brownie Sundae Cheesecake Dessert Recipe
Introduction
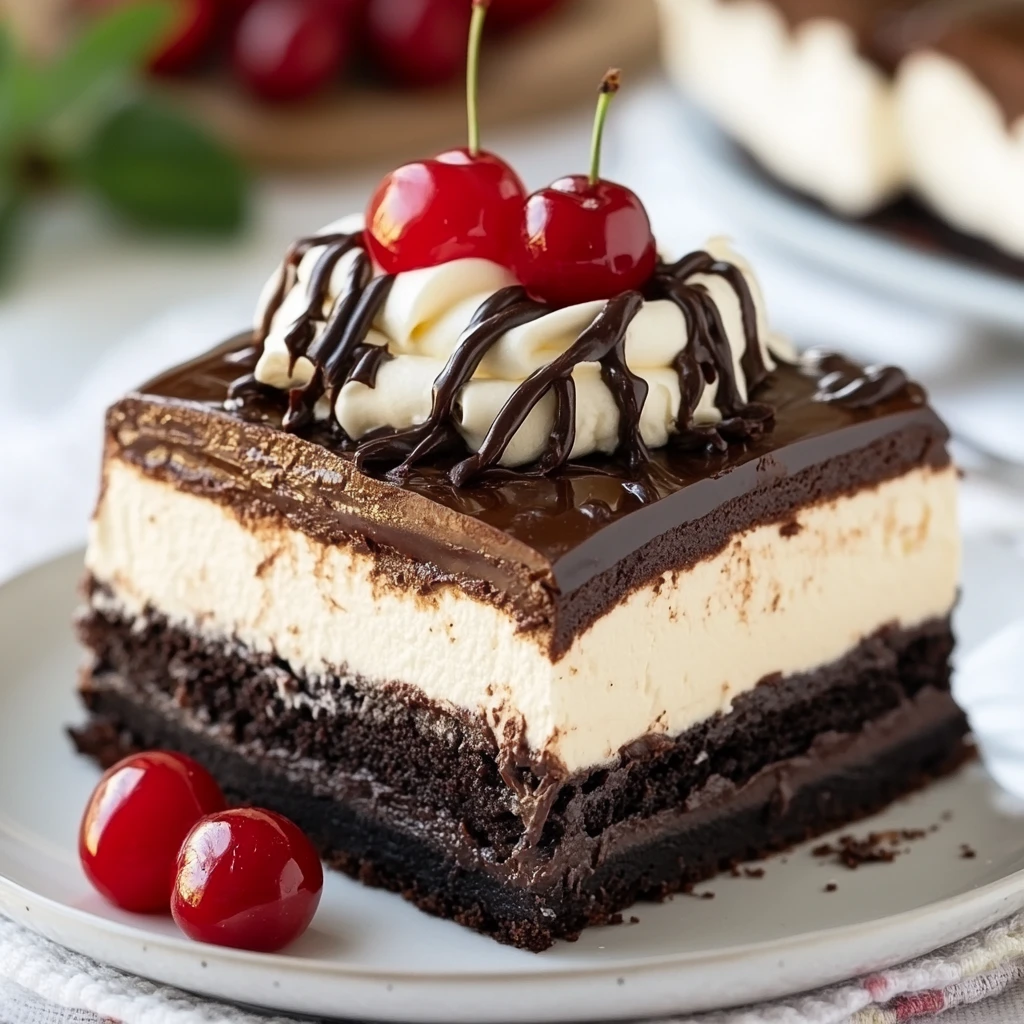
Have you ever wondered how to combine the rich, fudgy goodness of brownies with the creamy delight of cheesecake? What if I told you that you could create a dessert that not only satisfies your sweet tooth but also impresses your guests? The Brownie Sundae Cheesecake is the answer! This delightful dessert brings together layers of chocolate brownie, smooth cheesecake, and your favorite sundae toppings, creating a symphony of flavors that is sure to tantalize your taste buds.
In this post, we will explore the detailed recipe for this indulgent treat, along with tips, nutritional information, and creative serving suggestions. So, let’s dive in and discover how to make this Brownie Sundae Cheesecake Dessert!
Ingredients List
To create the perfect Brownie Sundae Cheesecake, you’ll need the following ingredients:
For the Brownie Layer:
- 1 cup (200g) granulated sugar: Adds sweetness and moisture.
- 1/2 cup (115g) unsalted butter, melted: Enhances richness; can substitute with coconut oil for a dairy-free option.
- 2 large eggs: Provides structure; flax eggs can be used for a vegan alternative.
- 1 teaspoon vanilla extract: Adds depth of flavor.
- 1/3 cup (40g) unsweetened cocoa powder: For that rich chocolate flavor.
- 1/2 cup (65g) all-purpose flour: Gives structure; almond flour can be a gluten-free substitute.
- 1/4 teaspoon salt: Balances sweetness.
- 1/2 cup (90g) chocolate chips: Optional, but highly recommended for extra chocolatey goodness.
For the Cheesecake Layer:
- 2 (8 oz) packages cream cheese, softened: The creamy base; can use dairy-free cream cheese.
- 1 cup (120g) powdered sugar: Sweetens the cheesecake.
- 1 teaspoon vanilla extract: Enhances flavor.
- 2 large eggs: Helps set the cheesecake; can replace with silken tofu for a vegan option.
For Toppings:
- Chocolate syrup: For drizzling.
- Whipped cream: To add lightness.
- Cherries or nuts: For garnish.
Timing
This Brownie Sundae Cheesecake takes approximately 90 minutes to prepare and bake, which is 20% less time than many traditional cheesecake recipes. Here’s the breakdown:
- Preparation time: 25 minutes
- Cooking time: 45 minutes
- Cooling time: 20 minutes (plus additional chilling time if desired)
Step-by-Step Instructions
Step 1: Preheat the Oven
Preheat your oven to 350°F (175°C). This ensures that your brownie layer cooks evenly and achieves that perfect fudgy texture.
Step 2: Prepare the Brownie Layer
- Mix the wet ingredients: In a large bowl, combine the melted butter and granulated sugar. Stir until well blended. Add the eggs and vanilla extract, mixing until smooth.
- Combine dry ingredients: In another bowl, whisk together the cocoa powder, flour, and salt.
- Combine wet and dry: Gradually add the dry mixture to the wet ingredients, stirring until just combined. Fold in the chocolate chips if using.
- Bake the brownie layer: Pour the brownie batter into a greased 9-inch springform pan, spreading it evenly. Bake for 25 minutes or until a toothpick inserted comes out with a few moist crumbs.
Step 3: Prepare the Cheesecake Layer
- Beat the cream cheese: In a mixing bowl, beat the softened cream cheese until smooth and creamy.
- Add sugar and vanilla: Gradually add the powdered sugar and vanilla extract, mixing until combined.
- Incorporate eggs: Add the eggs one at a time, mixing on low speed until just blended. Do not overmix.
Step 4: Assemble and Bake
- Layer the cheesecake: Once the brownie layer is baked, remove it from the oven and let it cool for about 10 minutes. Pour the cheesecake mixture over the brownie layer, smoothing the top.
- Bake the cheesecake: Return the pan to the oven and bake for an additional 20 minutes, or until the edges are set and the center slightly jiggles.
Step 5: Cool and Chill
- Cool the cheesecake: Turn off the oven and leave the cheesecake inside for an additional hour to cool gradually.
- Chill: Once cooled, refrigerate for at least 4 hours or overnight for the best texture.
Nutritional Information
Here’s a breakdown of the nutritional content per serving (based on 12 servings):
- Calories: 350
- Total Fat: 22g
- Saturated Fat: 10g
- Cholesterol: 75mg
- Sodium: 200mg
- Total Carbohydrates: 30g
- Dietary Fiber: 2g
- Sugars: 20g
- Protein: 6g
Note: Nutritional values may vary based on specific ingredients used and portion sizes.
Healthier Alternatives for the Recipe
If you’re looking to make this dessert a bit healthier without sacrificing flavor, consider these alternatives:
- Sugar substitutes: Use stevia or monk fruit sweetener in place of granulated sugar.
- Whole grain flour: Substitute all-purpose flour with whole wheat or oat flour for added fiber.
- Greek yogurt: Replace some of the cream cheese with Greek yogurt for a protein boost and lighter texture.
- Nut butter: Use almond or peanut butter instead of butter for a nutty flavor and healthy fats.
Serving Suggestions
To make your Brownie Sundae Cheesecake even more delightful, consider these serving ideas:
- Layered presentation: Serve slices with layers of whipped cream, chocolate syrup, and chopped nuts for an elegant look.
- Ice cream scoop: Add a scoop of vanilla or coffee ice cream on top for an indulgent sundae experience.
- Fruit toppings: Fresh strawberries or raspberries can add a refreshing contrast to the rich flavors.
Common Mistakes to Avoid
- Overmixing the cheesecake: This can lead to cracks in the surface. Mix just until combined.
- Skipping the cooling step: Allowing the cheesecake to cool in the oven helps prevent cracking.
- Not chilling long enough: For the best texture, chill the cheesecake overnight if possible.
Storing Tips for the Recipe
To keep your Brownie Sundae Cheesecake fresh:
- Refrigeration: Store leftovers in an airtight container in the fridge for up to 5 days.
- Freezing: Wrap individual slices in plastic wrap and foil, then freeze for up to 3 months. Thaw in the refrigerator before serving.
Conclusion
The Brownie Sundae Cheesecake is a delicious fusion of flavors that is sure to impress. With its rich brownie base, creamy cheesecake layer, and delightful toppings, this dessert is perfect for any occasion. Try this recipe today, and don’t forget to share your experience in the comments below! Subscribe for more delightful recipes and updates!
FAQs
Can I make this dessert ahead of time?
Yes! The Brownie Sundae Cheesecake can be made a day in advance and stored in the refrigerator.
Is it possible to make this recipe gluten-free?
Absolutely! Simply substitute the all-purpose flour with a gluten-free flour blend.
Can I use a different type of cheese for the cheesecake layer?
You can use ricotta or mascarpone cheese for a different flavor profile, but the texture may vary.
What can I substitute for eggs in this recipe?
For each egg, you can use 1/4 cup of unsweetened applesauce or a flax egg (1 tablespoon ground flaxseed mixed with 2.5 tablespoons water).
How do I know when the cheesecake is done?
The edges should be set, and the center should have a slight jiggle. It will firm up as it cools.

Brownie Sundae Cheesecake Dessert Recipe
Ingredients
- For the Brownie Layer:
- 1 cup (200g) granulated sugar: Adds sweetness and moisture.
- 1/2 cup (115g) unsalted butter, melted: Enhances richness; can substitute with coconut oil for a dairy-free option.
- 2 large eggs: Provides structure; flax eggs can be used for a vegan alternative.
- 1 teaspoon vanilla extract: Adds depth of flavor.
- 1/3 cup (40g) unsweetened cocoa powder: For that rich chocolate flavor.
- 1/2 cup (65g) all-purpose flour: Gives structure; almond flour can be a gluten-free substitute.
- 1/4 teaspoon salt: Balances sweetness.
- 1/2 cup (90g) chocolate chips: Optional, but highly recommended for extra chocolatey goodness.
- For the Cheesecake Layer:
- 2 (8 oz) packages cream cheese, softened: The creamy base; can use dairy-free cream cheese.
- 1 cup (120g) powdered sugar: Sweetens the cheesecake.
- 1 teaspoon vanilla extract: Enhances flavor.
- 2 large eggs: Helps set the cheesecake; can replace with silken tofu for a vegan option.
- For Toppings:
- Chocolate syrup: For drizzling.
- Whipped cream: To add lightness.
- Cherries or nuts: For garnish.
Instructions
- Mix the wet ingredients: In a large bowl, combine the melted butter and granulated sugar. Stir until well blended. Add the eggs and vanilla extract, mixing until smooth.
- Combine dry ingredients: In another bowl, whisk together the cocoa powder, flour, and salt.
- Combine wet and dry: Gradually add the dry mixture to the wet ingredients, stirring until just combined. Fold in the chocolate chips if using.
- Bake the brownie layer: Pour the brownie batter into a greased 9-inch springform pan, spreading it evenly. Bake for 25 minutes or until a toothpick inserted comes out with a few moist crumbs.
- Beat the cream cheese: In a mixing bowl, beat the softened cream cheese until smooth and creamy.
- Add sugar and vanilla: Gradually add the powdered sugar and vanilla extract, mixing until combined.
- Incorporate eggs: Add the eggs one at a time, mixing on low speed until just blended. Do not overmix.
- Layer the cheesecake: Once the brownie layer is baked, remove it from the oven and let it cool for about 10 minutes. Pour the cheesecake mixture over the brownie layer, smoothing the top.
- Bake the cheesecake: Return the pan to the oven and bake for an additional 20 minutes, or until the edges are set and the center slightly jiggles.
- Cool the cheesecake: Turn off the oven and leave the cheesecake inside for an additional hour to cool gradually.
- Chill: Once cooled, refrigerate for at least 4 hours or overnight for the best texture.
Step 1: Preheat the Oven
Preheat your oven to 350°F (175°C). This ensures that your brownie layer cooks evenly and achieves that perfect fudgy texture.