
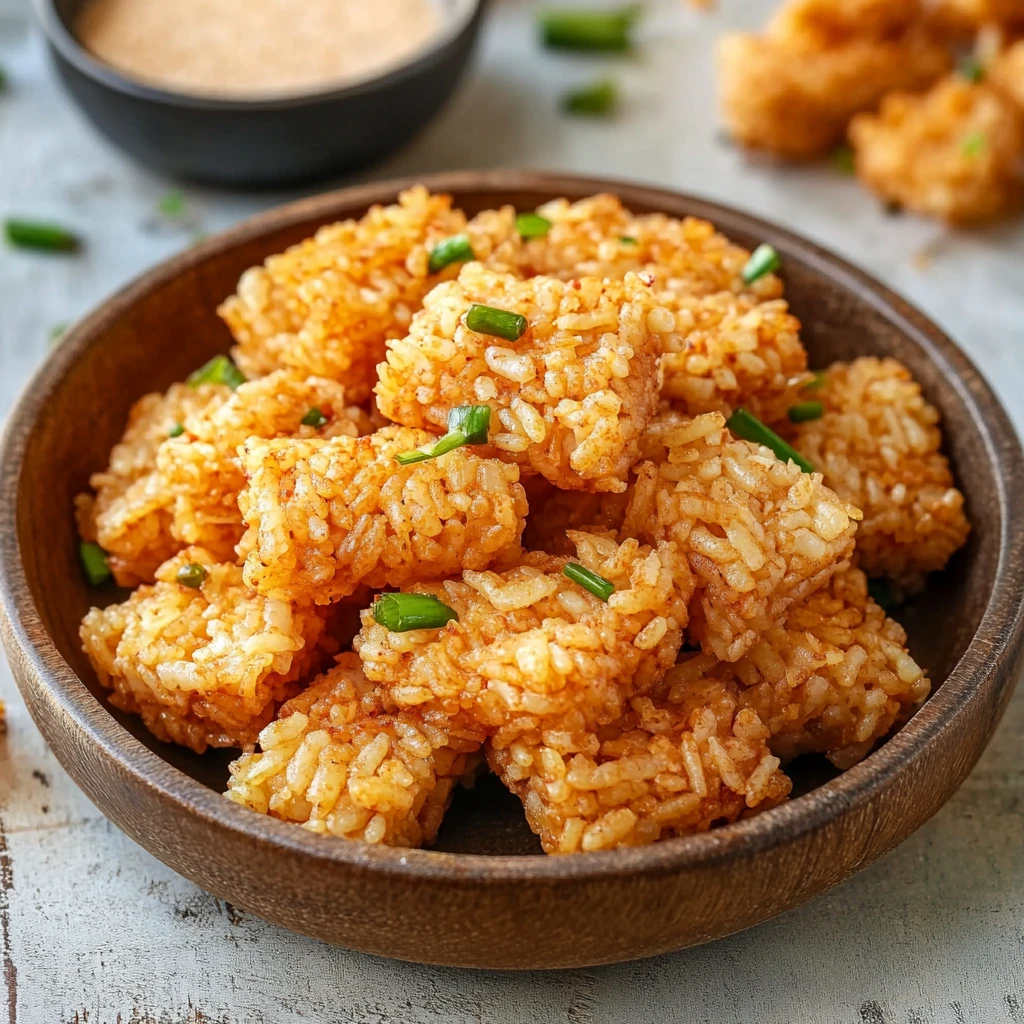
Crispy Rice Snack Recipe
Introduction
Have you ever wondered how a simple ingredient like rice can be transformed into a delightful crispy snack? With the rise of healthy snacking trends, many are looking for alternatives to traditional chips and sweets. The crispy rice snack recipe provides a nutritious and delicious option that’s easy to make at home. In this post, we’ll explore how to create these delightful treats that not only satisfy your cravings but also contribute to a balanced diet. Let’s dive into this exciting culinary adventure!
Ingredients List
To make your crispy rice snacks, you’ll need the following ingredients:
- 2 cups of cooked rice (white or brown)
- 1 cup of rice flour (for extra crispiness; can substitute with almond flour)
- 1/4 cup of corn starch (for a lighter texture)
- 1 teaspoon of salt (adjust to taste)
- 1 teaspoon of garlic powder (optional, for flavor)
- 1/2 teaspoon of paprika (for a hint of spice)
- 1/4 cup of water (adjust as necessary)
- Oil for frying (coconut or vegetable oil works best)
Substitutions
- Rice: Quinoa or millet can be used for a gluten-free version.
- Rice Flour: Oat flour or chickpea flour can be excellent alternatives.
- Spices: Feel free to experiment with different herbs and spices, such as onion powder or nutritional yeast for a cheesy flavor.
Timing
This crispy rice snack recipe is quick and efficient, taking approximately 30 minutes from start to finish. Here’s the breakdown:
- Preparation Time: 10 minutes
- Cooking Time: 20 minutes
This is about 25% less time than many traditional snack recipes that require lengthy baking or cooking processes.
Step-by-Step Instructions
Step 1: Prepare the Rice Mixture
In a large mixing bowl, combine the cooked rice, rice flour, corn starch, salt, garlic powder, and paprika. Mix well until all ingredients are evenly distributed.
Tip: For a smoother mixture, you can blend the cooked rice in a food processor before adding the dry ingredients.
Step 2: Add Water
Gradually add water to the mixture, stirring continuously until you achieve a thick, dough-like consistency. The mixture should be moldable but not too sticky.
Tip: If the mixture is too dry, add a teaspoon of water at a time until it reaches the desired consistency.
Step 3: Shape the Snacks
Take small portions of the mixture and shape them into small patties or balls, about the size of a golf ball. Flatten them slightly to ensure even cooking.
Tip: Use wet hands to prevent sticking while shaping the snacks.
Step 4: Heat the Oil
In a deep frying pan, heat oil over medium heat. To test if the oil is ready, drop a small piece of the mixture into the oil; it should sizzle immediately.
Tip: Ensure the oil is hot enough to avoid soggy snacks.
Step 5: Fry the Snacks
Carefully place the shaped rice snacks into the hot oil. Fry them in batches to avoid overcrowding the pan. Cook for about 3-4 minutes on each side until golden brown and crispy.
Tip: Use a slotted spoon to turn the snacks gently to avoid breaking them.
Step 6: Drain and Cool
Once golden, remove the snacks from the oil and place them on a paper towel-lined plate to drain excess oil.
Tip: Sprinkle a little extra salt while they are still hot for added flavor.
Nutritional Information
Here’s a breakdown of the nutritional content per serving (about 4 snacks):
- Calories: 150
- Protein: 3g
- Carbohydrates: 25g
- Fat: 5g
- Fiber: 1g
- Sodium: 200mg
Note: Nutritional values may vary based on specific ingredients and cooking methods.
Healthier Alternatives for the Recipe
If you’re looking to make your crispy rice snacks even healthier, consider the following modifications:
- Use Brown Rice: Opting for brown rice instead of white increases fiber and nutrients.
- Baking Instead of Frying: Bake the shaped snacks at 375°F (190°C) for about 20-25 minutes, flipping halfway through for a healthier, oil-free version.
- Add Seeds: Incorporate chia seeds or flaxseeds into the mixture for added omega-3 fatty acids.
Serving Suggestions
Crispy rice snacks can be enjoyed in various ways:
- Dipping Sauces: Serve with hummus, guacamole, or a spicy salsa for added flavor.
- Toppings: Top with avocado slices, cheese, or a sprinkle of nutritional yeast for a savory twist.
- Snack Mix: Combine with nuts and dried fruits for a crunchy snack mix.
Personal Tip: Try pairing these snacks with a refreshing drink like lemonade or iced tea for a perfect afternoon treat.
Common Mistakes to Avoid
- Overcrowding the Pan: Frying too many snacks at once can lower the oil temperature, resulting in greasy snacks.
- Not Heating the Oil Properly: If the oil isn’t hot enough, the snacks will absorb too much oil and become soggy.
- Skipping the Drain Step: Failing to drain the snacks properly can lead to a greasy texture.
Storing Tips for the Recipe
To maintain the freshness and crunch of your crispy rice snacks, follow these storage tips:
- Cool Completely: Allow snacks to cool completely before storing to prevent moisture buildup.
- Airtight Container: Store in an airtight container at room temperature for up to 3 days.
- Recrisping: If they lose their crunch, reheat in the oven at 350°F (175°C) for a few minutes to restore crispiness.
Conclusion
In summary, making crispy rice snacks is a fun and rewarding endeavor that offers a delicious alternative to conventional snacks. With simple ingredients and straightforward steps, you can create a delightful treat that is both satisfying and nutritious. We encourage you to try this recipe, share your thoughts in the comments, and subscribe for more delicious updates!
FAQs
Q1: Can I use leftover rice for this recipe?
A1: Absolutely! Leftover rice works perfectly and can save you time in preparation.
Q2: Are these snacks gluten-free?
A2: Yes, by using rice flour and ensuring all ingredients are gluten-free, you can enjoy these snacks without worry.
Q3: How can I make these snacks spicy?
A3: Add cayenne pepper or chili powder to the mixture for an extra kick!
Q4: Can I bake these instead of frying?
A4: Yes, baking is a great alternative! Just adjust the cooking time and temperature as mentioned above.
Q5: What other flavors can I add?
A5: Experiment with different herbs, spices, or even cheese powder for unique flavor profiles!

Crispy Rice Snack Recipe
Ingredients
- 2 cups of cooked rice (white or brown)
- 1 cup of rice flour (for extra crispiness; can substitute with almond flour)
- 1/4 cup of corn starch (for a lighter texture)
- 1 teaspoon of salt (adjust to taste)
- 1 teaspoon of garlic powder (optional, for flavor)
- 1/2 teaspoon of paprika (for a hint of spice)
- 1/4 cup of water (adjust as necessary)
- Oil for frying (coconut or vegetable oil works best)
- Substitutions
- Rice: Quinoa or millet can be used for a gluten-free version.
- Rice Flour: Oat flour or chickpea flour can be excellent alternatives.
- Spices: Feel free to experiment with different herbs and spices, such as onion powder or nutritional yeast for a cheesy flavor.
Instructions
Step 1: Prepare the Rice Mixture
In a large mixing bowl, combine the cooked rice, rice flour, corn starch, salt, garlic powder, and paprika. Mix well until all ingredients are evenly distributed.
Tip: For a smoother mixture, you can blend the cooked rice in a food processor before adding the dry ingredients.
Step 2: Add Water
Gradually add water to the mixture, stirring continuously until you achieve a thick, dough-like consistency. The mixture should be moldable but not too sticky.
Tip: If the mixture is too dry, add a teaspoon of water at a time until it reaches the desired consistency.
Step 3: Shape the Snacks
Take small portions of the mixture and shape them into small patties or balls, about the size of a golf ball. Flatten them slightly to ensure even cooking.
Tip: Use wet hands to prevent sticking while shaping the snacks.
Step 4: Heat the Oil
In a deep frying pan, heat oil over medium heat. To test if the oil is ready, drop a small piece of the mixture into the oil; it should sizzle immediately.
Tip: Ensure the oil is hot enough to avoid soggy snacks.
Step 5: Fry the Snacks
Carefully place the shaped rice snacks into the hot oil. Fry them in batches to avoid overcrowding the pan. Cook for about 3-4 minutes on each side until golden brown and crispy.
Tip: Use a slotted spoon to turn the snacks gently to avoid breaking them.
Step 6: Drain and Cool
Once golden, remove the snacks from the oil and place them on a paper towel-lined plate to drain excess oil.
Tip: Sprinkle a little extra salt while they are still hot for added flavor.