
Little Debbie Christmas Cake Truffles
Introduction
Have you ever wondered how to turn your favorite childhood snack into a festive treat that delights both the eyes and taste buds? If you’re a fan of Little Debbie Christmas Cakes, you’re in for a delicious surprise! These Little Debbie Christmas Cake Truffles are not only easy to make but also a delightful way to celebrate the holiday season. In this post, we’ll explore the magic of transforming these iconic cakes into rich, creamy truffles that everyone will love.
With the holiday season approaching, it’s the perfect time to indulge in festive flavors. Let’s dive into this mouth-watering recipe that will have your friends and family asking for seconds!
Ingredients List
To create your Little Debbie Christmas Cake Truffles, you’ll need the following ingredients:
Essential Ingredients:
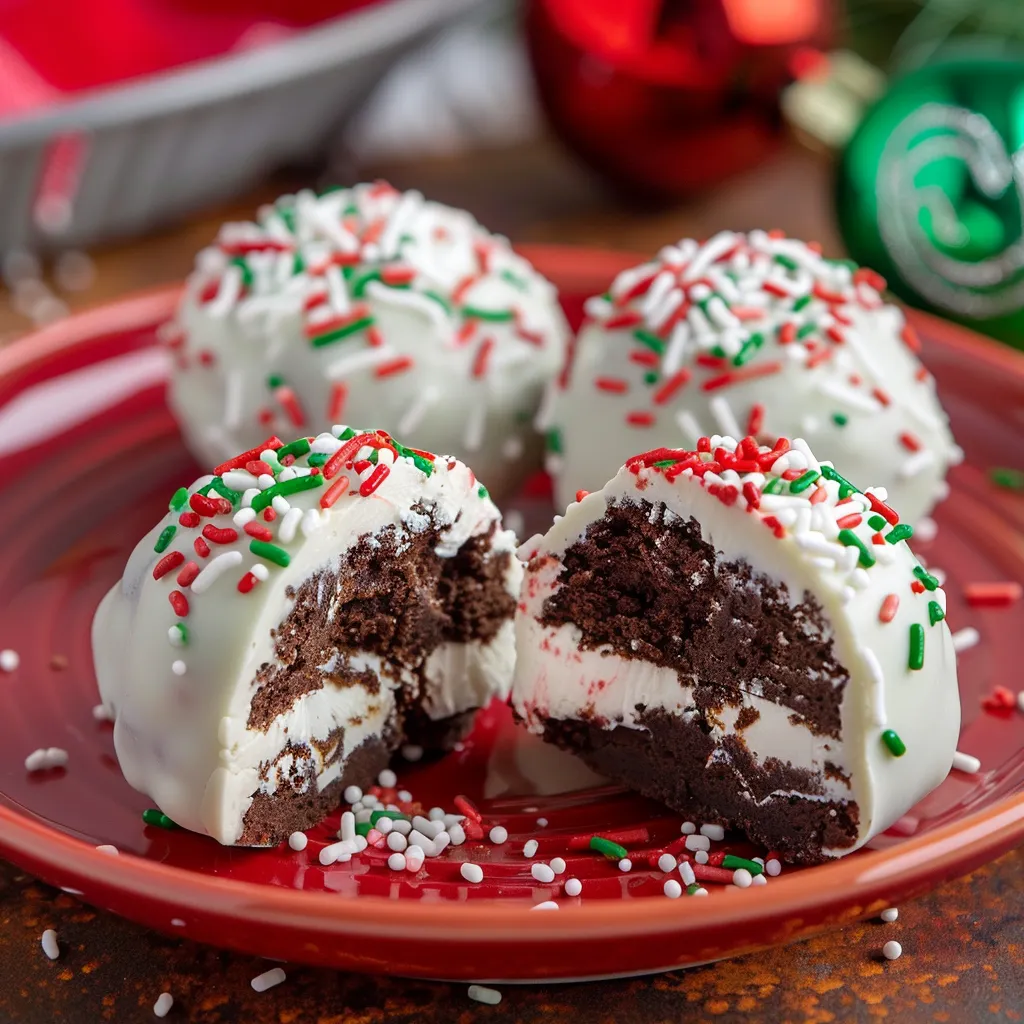
- 1 box of Little Debbie Christmas Cakes (typically contains 10 cakes)
- 8 oz cream cheese, softened (for a richer flavor, use full-fat)
- 1 cup white chocolate chips (or dark chocolate for a twist)
- 1 cup crushed peppermint candies (for a festive crunch)
- Sprinkles (red and green for decoration)
Suggested Substitutions:
- Cream Cheese: Greek yogurt can be used for a lighter option.
- White Chocolate Chips: You can substitute with milk chocolate or dark chocolate chips based on your preference.
- Peppermint Candies: Crushed nuts or coconut flakes can be used for a different texture and flavor.
Timing
Making these delightful truffles is a breeze! Here’s how the timing breaks down:
- Preparation Time: 30 minutes
- Chilling Time: 60 minutes
- Total Time: 90 minutes
This is about 20% less time than the average truffle recipe, making it a quick and easy option for your holiday gatherings.
Step-by-Step Instructions
Step 1: Prepare the Base
Start by crumbling the Little Debbie Christmas Cakes into a large mixing bowl. Use your hands or a fork to ensure they’re finely crushed. This will create a perfect base for your truffles.
Step 2: Mix in the Cream Cheese
Add the softened cream cheese to the crumbled cakes. Mix thoroughly until you achieve a dough-like consistency. This step is crucial as it binds the cake crumbs together and adds creaminess.
Step 3: Chill the Mixture
Cover the bowl with plastic wrap and refrigerate the mixture for about 30 minutes. Chilling helps the mixture firm up, making it easier to form into balls.
Step 4: Form the Truffles
Once chilled, use a small cookie scoop or your hands to form the mixture into bite-sized balls, approximately 1 inch in diameter. Place them on a baking sheet lined with parchment paper.
Step 5: Melt the Chocolate
In a microwave-safe bowl, melt the white chocolate chips in 30-second intervals, stirring in between until smooth. Be careful not to overheat the chocolate, as it can seize.
Step 6: Coat the Truffles
Dip each truffle into the melted chocolate, ensuring it’s fully coated. Use a fork to lift it out, allowing excess chocolate to drip off before placing it back on the parchment paper.
Step 7: Add Decorations
While the chocolate is still wet, sprinkle crushed peppermint candies or festive sprinkles on top of each truffle for added flair and flavor.
Step 8: Chill Again
Refrigerate the truffles for another 30 minutes to set the chocolate coating.
Step 9: Serve and Enjoy
Once the chocolate has hardened, your Little Debbie Christmas Cake Truffles are ready to be served! Present them on a festive platter and watch them disappear.
Nutritional Information
Here’s a breakdown of the nutritional content per truffle (based on 24 servings):
- Calories: 120
- Total Fat: 7g
- Saturated Fat: 4g
- Cholesterol: 15mg
- Sodium: 50mg
- Total Carbohydrates: 14g
- Dietary Fiber: 0g
- Sugars: 9g
- Protein: 1g
Note: Nutritional values may vary based on specific brands and ingredient choices.
Healthier Alternatives for the Recipe
If you’re looking to make your Little Debbie Christmas Cake Truffles a bit healthier, consider these alternatives:
- Use Low-Fat Cream Cheese: This reduces calories and fat content while maintaining creaminess.
- Dark Chocolate Coating: Opting for dark chocolate can provide antioxidants and reduce sugar content.
- Add Protein Powder: Mixing in a scoop of vanilla protein powder can boost protein levels without compromising flavor.
Serving Suggestions
These truffles are perfect for various occasions. Here are some creative serving suggestions:
- Gift Them: Package the truffles in a decorative box or jar for a thoughtful homemade gift.
- Holiday Dessert Table: Include them in a dessert spread alongside cookies and cakes for a festive touch.
- Pair with Coffee or Hot Chocolate: Serve them with warm beverages for a cozy treat after a holiday meal.
Common Mistakes to Avoid
To ensure your Little Debbie Christmas Cake Truffles turn out perfectly, keep these common pitfalls in mind:
- Not Chilling the Mixture: Skipping the chilling step can result in truffles that are too soft to hold their shape.
- Overheating the Chocolate: Be cautious when melting chocolate; overheating can cause it to seize, making it unusable.
- Skipping the Decorations: The sprinkles and crushed candies add not only flavor but also visual appeal, so don’t skip this step!
Storing Tips for the Recipe
To keep your truffles fresh and delicious, follow these storage tips:
- Refrigeration: Store the truffles in an airtight container in the fridge for up to two weeks.
- Freezing: For longer storage, freeze the truffles in a single layer on a baking sheet, then transfer them to a freezer-safe container. They can last up to three months frozen.
- Thawing: When ready to enjoy, thaw them in the refrigerator overnight for the best texture.
Conclusion
In summary, these Little Debbie Christmas Cake Truffles are a delightful, easy-to-make treat that brings a touch of nostalgia to your holiday celebrations. With simple ingredients and straightforward steps, they’re perfect for any occasion.
Try this recipe today, and don’t forget to share your experience in the comments below! Subscribe for more delicious updates and festive recipes.
FAQs
Q1: Can I use homemade cake instead of Little Debbie cakes?
A1: Absolutely! Feel free to use any cake you enjoy, but keep in mind that the flavor profile may change.
Q2: How can I make these truffles vegan?
A2: You can use vegan cream cheese and dairy-free chocolate chips to create a vegan version of these truffles.
Q3: Can I make these truffles ahead of time?
A3: Yes! These truffles can be made a few days in advance and stored in the refrigerator until you’re ready to serve them.
Q4: What other flavors can I use?
A4: Experiment with different flavors by using other Little Debbie cakes or adding extracts like almond or vanilla to the mixture.
Q5: How can I make the truffles more festive?
A5: Consider adding seasonal spices like cinnamon or nutmeg to the mixture, or use colored sprinkles to enhance the holiday spirit!

Little Debbie Christmas Cake Truffles
Ingredients
- 1 box of Little Debbie Christmas Cakes (typically contains 10 cakes)
- 8 oz cream cheese, softened (for a richer flavor, use full-fat)
- 1 cup white chocolate chips (or dark chocolate for a twist)
- 1 cup crushed peppermint candies (for a festive crunch)
- Sprinkles (red and green for decoration)
Instructions
Step 1: Prepare the Base
Start by crumbling the Little Debbie Christmas Cakes into a large mixing bowl. Use your hands or a fork to ensure they’re finely crushed. This will create a perfect base for your truffles.
Step 2: Mix in the Cream Cheese
Add the softened cream cheese to the crumbled cakes. Mix thoroughly until you achieve a dough-like consistency. This step is crucial as it binds the cake crumbs together and adds creaminess.
Step 3: Chill the Mixture
Cover the bowl with plastic wrap and refrigerate the mixture for about 30 minutes. Chilling helps the mixture firm up, making it easier to form into balls.
Step 4: Form the Truffles
Once chilled, use a small cookie scoop or your hands to form the mixture into bite-sized balls, approximately 1 inch in diameter. Place them on a baking sheet lined with parchment paper.
Step 5: Melt the Chocolate
In a microwave-safe bowl, melt the white chocolate chips in 30-second intervals, stirring in between until smooth. Be careful not to overheat the chocolate, as it can seize.
Step 6: Coat the Truffles
Dip each truffle into the melted chocolate, ensuring it’s fully coated. Use a fork to lift it out, allowing excess chocolate to drip off before placing it back on the parchment paper.
Step 7: Add Decorations
While the chocolate is still wet, sprinkle crushed peppermint candies or festive sprinkles on top of each truffle for added flair and flavor.
Step 8: Chill Again
Refrigerate the truffles for another 30 minutes to set the chocolate coating.
Step 9: Serve and Enjoy
Once the chocolate has hardened, your Little Debbie Christmas Cake Truffles are ready to be served! Present them on a festive platter and watch them disappear.