
Orange Dreamsicle Fudge Sweet Treat
Introduction
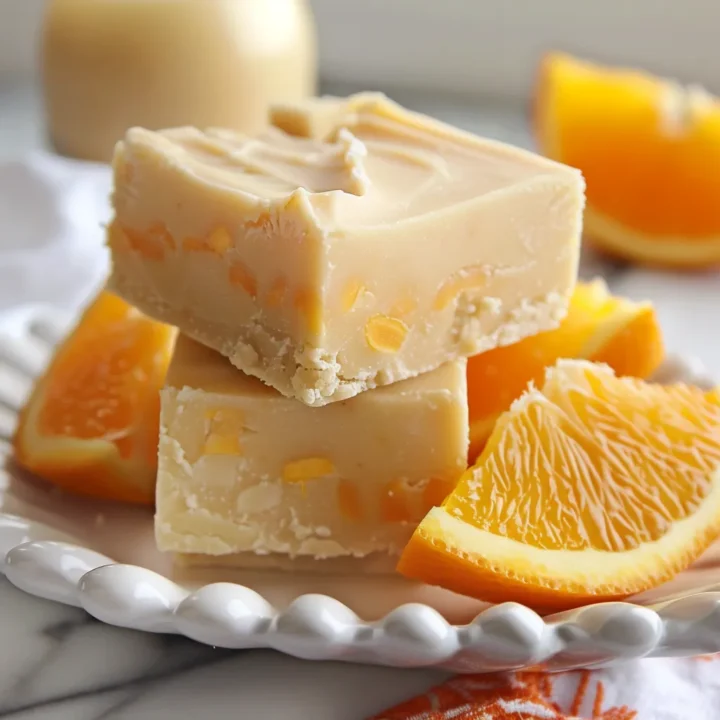
Have you ever wondered how a simple treat can evoke the nostalgic flavors of summer? The Orange Dreamsicle Fudge is not just a dessert; it’s a delightful fusion of creamy vanilla and zesty orange that transports you back to childhood. This recipe incorporates the focus keyword naturally while promising a sweet escape that’s both easy to make and hard to resist. In this blog post, we’ll explore how to create this delectable fudge, share tips for enhancing its flavor, and provide insights into its nutritional benefits.
Ingredients List
To make your Orange Dreamsicle Fudge, you will need the following ingredients:
- 2 cups white chocolate chips: The base for your creamy fudge.
- 1 can (14 oz) sweetened condensed milk: Adds richness and sweetness.
- 1/4 cup unsalted butter: For a smooth texture.
- 1 tablespoon orange zest: Freshly grated for a vibrant flavor.
- 1/4 cup fresh orange juice: Enhances the citrusy notes.
- 1 teaspoon vanilla extract: Complements the orange flavor.
- Pinch of salt: Balances the sweetness.
Suggested Substitutions:
- White chocolate chips: You can use milk chocolate chips for a different flavor profile.
- Sweetened condensed milk: Substitute with evaporated milk for a lighter version.
- Fresh orange juice: Bottled juice works in a pinch, but fresh is always best for flavor.
Timing
Creating this Orange Dreamsicle Fudge is surprisingly quick! Here’s a breakdown of the timing:
- Preparation Time: 15 minutes
- Cooking Time: 15 minutes
- Total Time: 30 minutes
This is significantly less time than the average fudge recipe, which often requires longer cooling periods. You’ll have your delicious treat ready to enjoy in just half an hour!
Step-by-Step Instructions
Step 1: Prepare Your Pan
Start by lining an 8×8 inch baking dish with parchment paper. This will make it easier to remove the fudge once it’s set. Make sure to leave some overhang for easy lifting.
Step 2: Melt the Base
In a medium saucepan over low heat, combine the white chocolate chips, sweetened condensed milk, and unsalted butter. Stir continuously until melted and smooth. This should take about 5-7 minutes. Be careful not to let it burn!
Step 3: Add Flavor
Once the mixture is melted, remove it from heat. Stir in the orange zest, fresh orange juice, vanilla extract, and a pinch of salt. This step is crucial as it infuses the fudge with that signature dreamsicle flavor.
Step 4: Pour and Set
Pour the fudge mixture into the prepared baking dish. Use a spatula to spread it evenly. Let it cool at room temperature for about 10 minutes, then refrigerate for at least 2 hours or until firm.
Step 5: Cut and Serve
Once the fudge is set, lift it out of the pan using the parchment overhang. Cut into squares and enjoy!

Tips and Tricks:
- For a fun twist, consider swirling in some chocolate fudge before it sets for a marbled effect.
- If you want to add a bit of crunch, fold in some chopped nuts or crushed graham crackers before pouring into the pan.
Nutritional Information
Here’s a breakdown of the nutritional content per serving (assuming 16 servings):
- Calories: 150
- Total Fat: 8g
- Saturated Fat: 5g
- Cholesterol: 15mg
- Sodium: 30mg
- Total Carbohydrates: 20g
- Dietary Fiber: 0g
- Sugars: 15g
- Protein: 1g
This fudge is a delightful treat, but moderation is key due to its sugar content.
Healthier Alternatives for the Recipe
If you’re looking to make healthier modifications to your Orange Dreamsicle Fudge, consider the following suggestions:
- Use dark chocolate chips instead of white chocolate for a richer flavor and added antioxidants.
- Replace sweetened condensed milk with coconut milk or a homemade nut milk for a dairy-free version.
- Reduce sugar content by using sugar-free chocolate chips or incorporating a natural sweetener like honey or maple syrup.
These adjustments can help cater to various dietary preferences while still delivering that delicious dreamsicle taste.
Serving Suggestions
To elevate your Orange Dreamsicle Fudge, consider these serving ideas:
- Pair with fresh fruit: Serve alongside slices of fresh oranges or berries for a refreshing contrast.
- Create a dessert platter: Combine with other treats such as brownies, cookies, and fruit tarts for a colorful dessert spread.
- Garnish with whipped cream: A dollop of whipped cream or a scoop of vanilla ice cream can add a delightful creaminess to each bite.
Common Mistakes to Avoid
When making Orange Dreamsicle Fudge, keep these common pitfalls in mind:
- Not stirring enough: Ensure you stir continuously while melting to prevent burning.
- Skipping the chilling time: Allow the fudge to set properly in the refrigerator; otherwise, it may not hold its shape when cut.
- Using low-quality chocolate: The quality of chocolate directly impacts flavor. Choose good quality white chocolate for the best results.
Storing Tips for the Recipe
To keep your Orange Dreamsicle Fudge fresh and delicious, follow these storage tips:
- Refrigeration: Store fudge in an airtight container in the refrigerator for up to two weeks.
- Freezing: For longer storage, wrap individual pieces in plastic wrap and place them in a freezer-safe bag. They can last up to three months in the freezer.
- Room Temperature: If you plan to consume the fudge within a few days, it can be kept at room temperature in a cool, dry place.
Conclusion
In summary, the Orange Dreamsicle Fudge is a quick, delightful treat that brings together the flavors of orange and vanilla in a creamy, indulgent bite. It’s easy to make, customizable, and perfect for sharing. Don’t wait—try this recipe today, and let us know how it turns out! Share your experiences in the comments or subscribe for more delicious recipes!
FAQs
What is the best way to cut fudge?
Use a sharp knife and warm it slightly under hot water before cutting. This helps create clean edges.
Can I add other flavors to this fudge?
Absolutely! Consider adding almond extract or mixing in other citrus zests for a unique twist.
How do I know when the fudge is set?
The fudge should be firm to the touch and hold its shape when cut. Refrigerating it for at least 2 hours usually does the trick.
Is this recipe suitable for vegans?
You can make it vegan by using dairy-free chocolate chips and coconut milk instead of sweetened condensed milk.
Can I double the recipe?
Yes! Just ensure you use a larger pan and adjust the chilling time as needed.
Orange Dreamsicle Fudge Sweet Treat
Ingredients
- 2 cups white chocolate chips: The base for your creamy fudge.
- 1 can (14 oz) sweetened condensed milk: Adds richness and sweetness.
- 1/4 cup unsalted butter: For a smooth texture.
- 1 tablespoon orange zest: Freshly grated for a vibrant flavor.
- 1/4 cup fresh orange juice: Enhances the citrusy notes.
- 1 teaspoon vanilla extract: Complements the orange flavor.
- Pinch of salt: Balances the sweetness.
Instructions
Step 1: Prepare Your Pan
Start by lining an 8x8 inch baking dish with parchment paper. This will make it easier to remove the fudge once it’s set. Make sure to leave some overhang for easy lifting.
Step 2: Melt the Base
In a medium saucepan over low heat, combine the white chocolate chips, sweetened condensed milk, and unsalted butter. Stir continuously until melted and smooth. This should take about 5-7 minutes. Be careful not to let it burn!
Step 3: Add Flavor
Once the mixture is melted, remove it from heat. Stir in the orange zest, fresh orange juice, vanilla extract, and a pinch of salt. This step is crucial as it infuses the fudge with that signature dreamsicle flavor.
Step 4: Pour and Set
Pour the fudge mixture into the prepared baking dish. Use a spatula to spread it evenly. Let it cool at room temperature for about 10 minutes, then refrigerate for at least 2 hours or until firm.
Step 5: Cut and Serve
Once the fudge is set, lift it out of the pan using the parchment overhang. Cut into squares and enjoy!