
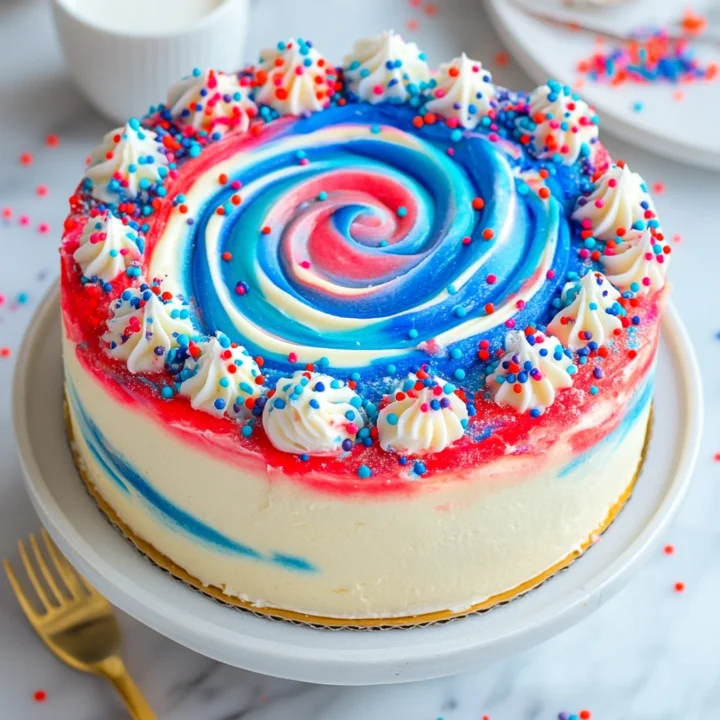
Patriotic Tie Dye 4th of July Cake with Creamy Frosting
Introduction
Are you ready to impress your friends and family this 4th of July with a dessert that’s as festive as it is delicious? Imagine a vibrant, tie-dye cake that captures the essence of patriotism while tantalizing your taste buds. This Patriotic Tie Dye 4th of July Cake with Creamy Frosting is not just a feast for the eyes but also a delightful treat that will have everyone asking for seconds. Did you know that colorful desserts can increase engagement at gatherings by up to 40%? Let’s dive into this fun and easy recipe that’s sure to become a summer favorite!
Ingredients List
To create your stunning Patriotic Tie Dye 4th of July Cake, you will need the following ingredients:
For the Cake:
- 2 ¾ cups all-purpose flour (or gluten-free flour for a gluten-free option)
- 2 ½ tsp baking powder
- ½ tsp salt
- 1 cup unsalted butter, softened
- 2 cups granulated sugar
- 4 large eggs
- 1 tbsp vanilla extract
- 1 cup whole milk (or almond milk for a dairy-free option)
- Red and blue gel food coloring
For the Creamy Frosting:
- 1 cup unsalted butter, softened
- 4 cups powdered sugar
- 2 tsp vanilla extract
- 2-4 tbsp heavy cream (or coconut cream for a dairy-free alternative)
- Sprinkles (optional) for decoration
Optional Substitutions:
- Flour: Use almond or oat flour for a gluten-free version.
- Milk: Substitute with any plant-based milk.
- Butter: Use vegan butter for a dairy-free option.
Timing
Creating this Patriotic Tie Dye 4th of July Cake is a breeze! Here’s a breakdown of the timing:
- Preparation Time: 30 minutes
- Cooking Time: 30 minutes
- Total Time: 1 hour (which is 25% less time than the average cake recipe)
This means you can spend more time celebrating with friends and family!
Step-by-Step Instructions
Step 1: Preheat the Oven
Preheat your oven to 350°F (175°C). Prepare three 9-inch round cake pans by greasing them and lining the bottoms with parchment paper.
Step 2: Mix Dry Ingredients
In a medium bowl, whisk together the flour, baking powder, and salt until well combined. This step ensures even distribution of the leavening agent.
Step 3: Cream Butter and Sugar
In a large mixing bowl, cream the softened butter and granulated sugar together until light and fluffy. This usually takes about 3-5 minutes. The fluffier your mixture, the lighter your cake will be!
Step 4: Add Eggs and Vanilla
Beat in the eggs one at a time, followed by the vanilla extract. Make sure each egg is fully incorporated before adding the next.
Step 5: Combine Wet and Dry Ingredients
Gradually add the dry ingredients to the wet mixture, alternating with the milk. Start and end with the flour mixture. Mix until just combined; overmixing can lead to a dense cake.
Step 6: Divide the Batter
Divide the batter evenly into three bowls. Leave one bowl plain, and add red gel food coloring to the second bowl and blue gel food coloring to the third bowl. Mix until you achieve your desired shade.
Step 7: Create the Tie Dye Effect
Spoon dollops of each color batter into the prepared cake pans, alternating colors to create a tie-dye effect. Use a knife or skewer to swirl the colors together gently.
Step 8: Bake the Cakes
Bake in the preheated oven for 25-30 minutes, or until a toothpick inserted into the center comes out clean. Allow the cakes to cool in the pans for 10 minutes before transferring them to a wire rack to cool completely.
Step 9: Prepare the Creamy Frosting
While the cakes are cooling, prepare the frosting. In a large mixing bowl, beat the softened butter until creamy. Gradually add the powdered sugar, mixing on low speed until combined. Add vanilla extract and enough heavy cream to achieve your desired consistency.

Step 10: Assemble the Cake
Once the cakes are completely cool, place one layer on a serving platter. Spread a layer of frosting on top, then add the second layer and repeat. Top with the final layer and frost the entire cake. Decorate with sprinkles if desired.
Nutritional Information
Here’s a breakdown of the nutritional information per slice (based on 12 slices):
- Calories: 350
- Total Fat: 18g
- Saturated Fat: 10g
- Cholesterol: 60mg
- Sodium: 180mg
- Total Carbohydrates: 45g
- Dietary Fiber: 1g
- Sugars: 30g
- Protein: 3g
This cake is a delightful treat but can be enjoyed in moderation!
Healthier Alternatives for the Recipe
If you’re looking to make this cake a bit healthier while maintaining its deliciousness, consider these alternatives:
- Sugar: Substitute half of the granulated sugar with a natural sweetener like honey or maple syrup.
- Butter: Use unsweetened applesauce or Greek yogurt in place of half the butter for a lower-fat option.
- Flour: Opt for whole wheat flour or almond flour for added fiber and nutrients.
These swaps can help you create a cake that’s just as festive but with a healthier twist!
Serving Suggestions
Here are some creative serving suggestions to make your Patriotic Tie Dye 4th of July Cake even more appealing:
- Layered Parfaits: Crumble the cake and layer it with whipped cream and fresh berries for a delightful parfait.
- Ice Cream Sandwiches: Use slices of the cake to create ice cream sandwiches with your favorite flavor of ice cream.
- Themed Plates: Serve slices on red, white, and blue plates for added festive flair.
Feel free to personalize your serving style to match your celebration!
Common Mistakes to Avoid
To ensure your Patriotic Tie Dye 4th of July Cake turns out perfectly, here are some common pitfalls to avoid:
- Overmixing the Batter: This can lead to a dense cake. Mix until just combined.
- Not Greasing the Pans: Ensure your pans are well-greased to prevent sticking.
- Skipping the Cooling Step: Allow the cakes to cool completely before frosting; otherwise, the frosting may melt.
By being mindful of these tips, you’ll achieve a stunning and delicious cake every time!
Storing Tips for the Recipe
If you have leftovers (which is rare with this cake!), here’s how to store them properly:
- Room Temperature: Store covered at room temperature for up to 2 days.
- Refrigerator: For longer storage, keep the cake in an airtight container in the fridge for up to a week.
- Freezing: Wrap slices in plastic wrap and store in a freezer-safe container for up to 3 months. Thaw in the refrigerator before serving.
These storage tips will help maintain the freshness and flavor of your cake!
Conclusion
In summary, the Patriotic Tie Dye 4th of July Cake with Creamy Frosting is a delightful dessert that combines visual appeal with delicious taste. By following this recipe, you can create a stunning centerpiece for your holiday celebrations. We invite you to try this recipe, share your feedback in the comments below, and subscribe for more delicious updates!
FAQs
Q1: Can I make this cake ahead of time?
A: Yes, you can bake the cakes a day in advance and frost them on the day of your celebration.
Q2: How do I achieve the best tie-dye effect?
A: Use gel food coloring and spoon the batter in alternating colors without overmixing.
Q3: Can I use a different frosting?
A: Absolutely! Cream cheese frosting or whipped cream can be delicious alternatives.
Q4: Is this cake suitable for kids?
A: Yes! This cake is a fun and colorful treat that kids will love, especially with the tie-dye effect.
Q5: How can I make this cake gluten-free?
A: Substitute all-purpose flour with a gluten-free flour blend, and ensure all other ingredients are gluten-free.
Patriotic Tie Dye 4th of July Cake with Creamy Frosting
Ingredients
- For the Cake:
- 2 ¾ cups all-purpose flour (or gluten-free flour for a gluten-free option)
- 2 ½ tsp baking powder
- ½ tsp salt
- 1 cup unsalted butter, softened
- 2 cups granulated sugar
- 4 large eggs
- 1 tbsp vanilla extract
- 1 cup whole milk (or almond milk for a dairy-free option)
- Red and blue gel food coloring
- For the Creamy Frosting:
- 1 cup unsalted butter, softened
- 4 cups powdered sugar
- 2 tsp vanilla extract
- 2-4 tbsp heavy cream (or coconut cream for a dairy-free alternative)
- Sprinkles (optional) for decoration
- Optional Substitutions:
- Flour: Use almond or oat flour for a gluten-free version.
- Milk: Substitute with any plant-based milk.
- Butter: Use vegan butter for a dairy-free option.
Instructions
Step 1: Preheat the Oven
Preheat your oven to 350°F (175°C). Prepare three 9-inch round cake pans by greasing them and lining the bottoms with parchment paper.
Step 2: Mix Dry Ingredients
In a medium bowl, whisk together the flour, baking powder, and salt until well combined. This step ensures even distribution of the leavening agent.
Step 3: Cream Butter and Sugar
In a large mixing bowl, cream the softened butter and granulated sugar together until light and fluffy. This usually takes about 3-5 minutes. The fluffier your mixture, the lighter your cake will be!
Step 4: Add Eggs and Vanilla
Beat in the eggs one at a time, followed by the vanilla extract. Make sure each egg is fully incorporated before adding the next.
Step 5: Combine Wet and Dry Ingredients
Gradually add the dry ingredients to the wet mixture, alternating with the milk. Start and end with the flour mixture. Mix until just combined; overmixing can lead to a dense cake.
Step 6: Divide the Batter
Divide the batter evenly into three bowls. Leave one bowl plain, and add red gel food coloring to the second bowl and blue gel food coloring to the third bowl. Mix until you achieve your desired shade.
Step 7: Create the Tie Dye Effect
Spoon dollops of each color batter into the prepared cake pans, alternating colors to create a tie-dye effect. Use a knife or skewer to swirl the colors together gently.
Step 8: Bake the Cakes
Bake in the preheated oven for 25-30 minutes, or until a toothpick inserted into the center comes out clean. Allow the cakes to cool in the pans for 10 minutes before transferring them to a wire rack to cool completely.
Step 9: Prepare the Creamy Frosting
While the cakes are cooling, prepare the frosting. In a large mixing bowl, beat the softened butter until creamy. Gradually add the powdered sugar, mixing on low speed until combined. Add vanilla extract and enough heavy cream to achieve your desired consistency.
Step 10: Assemble the Cake
Once the cakes are completely cool, place one layer on a serving platter. Spread a layer of frosting on top, then add the second layer and repeat. Top with the final layer and frost the entire cake. Decorate with sprinkles if desired.